Preparing to Install
Tools and materials
• Installation handle
• Ladder
• Installation PoE* cable (RJ45 fittings attached)
• Smartphone/device for Inseego Mobile App
• SIM card (4FF Nano)
• Phillips-head screwdriver
• M6 4mm hex driver
• Drill
• 14mm socket wrench/driver
• Needle nose pliers or tweezers
• Permanent round Cat6A PoE cable
• Ground wire
• Two RJ45 connector fittings for PoE cable
• Crimp tool to attach RJ45 fittings
• Cat6A Ethernet cable
• Sealing/weatherproofing material
Your FW2000e package includes: FW2000e device, PoE injector, and SIM tool.
NOTE: Mount installation packages are ordered and shipped separately.
Pre-Installation
1. Unscrew the protective shield over the SIM slots using a Phillips-head screwdriver.
NOTE: This device supports only Nano SIM cards.

2. Use the included SIM tool to insert a Nano 4FF SIM card into the appropriate SIM slot.
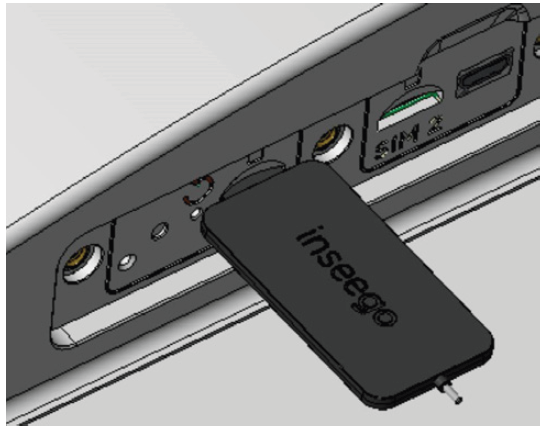
3. Reattach the protective shield cover to a torque of 1.2 Nm (0.885 ft/lb).
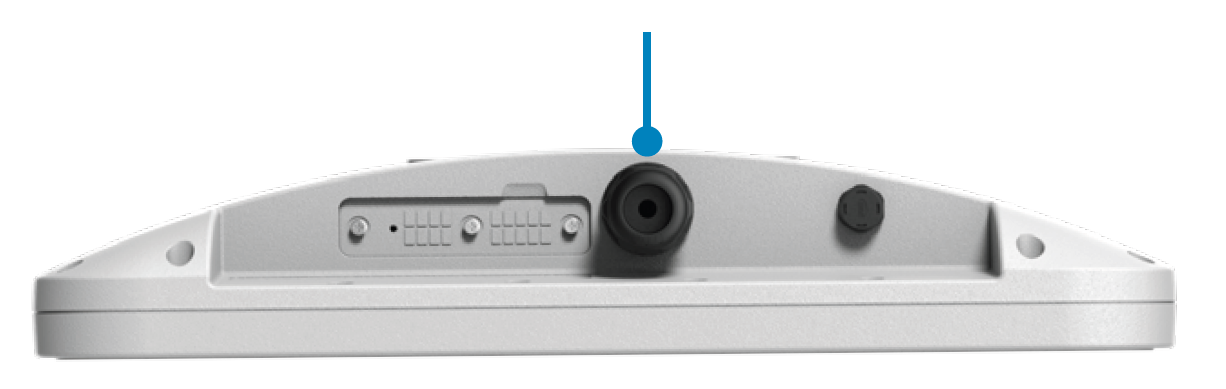
4. Unscrew the PoE gland cap and insert one end of the installation PoE cable.
NOTE: This is for location survey purposes only. You will install the permanent PoE cable later. Set aside the bushing and cap.
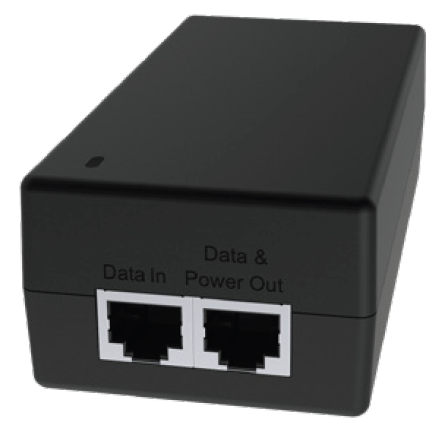
6. Insert the other end of the cable into the PoE injector Data & Power Out port. Plug the PoE injector into an earthed AC outlet.
Location Survey
1. Scan the QR code to download the Inseego Mobile App from Apple Store or Google Play Store, or visit https://inseego.com/inseegoconnect- get-app to download the App.

2. Follow instructions within the Inseego Mobile App to connect to the FW2000e and perform a 5G site survey to identify the ideal location to install.
Installing the PoE cable
1. Remove the installation PoE cable used for the location survey from the device using needle-nose pliers or tweezers.
2. Remove the rubber pin from the PoE gland bushing and assemble the gland cap, putting the bushing inside the spacer and into the cap.
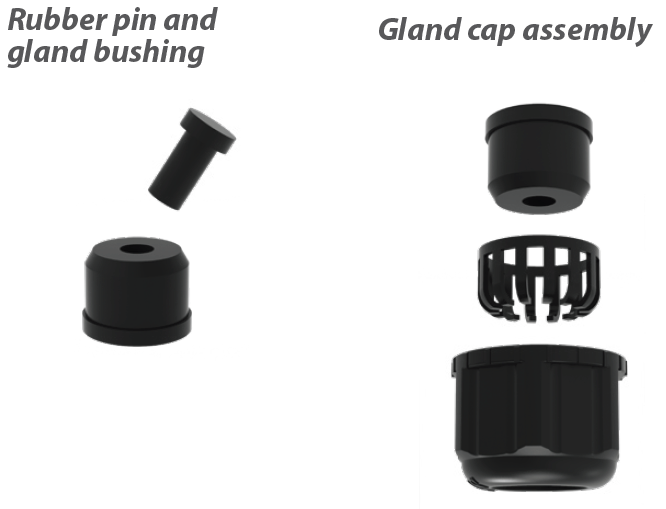
3. Thread the permanent PoE cable through the hole in the assembled PoE gland cap and attach a RJ45 connector to the cable.
4. Insert the connector into the FW2000e and screw on the gland cap. The cap will keep the PoE connection secure and watertight.
Orienting the device
1. Run the PoE cable to the desired location of the PoE injector (kept indoor)
2. Attach a RJ45 connector fitting and insert the cable into the Data & Power Out port on the PoE power injector.
3. Take a racheting socket wrench and device/smartphone with the Inseego Mobile App to the FW2000e location.
4. Use the Inseego Mobile App and fine tune the horizontal angle of the FW2000e for the best signal. Please find the link on How to improve Signal Quality
5. Tighten the bolts when the best signal is achieved.
6. Use sealing/weatherproofing material to seal any holes drilled in the structure to run the PoE cable.
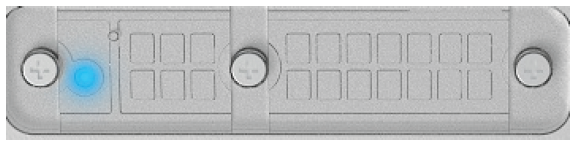
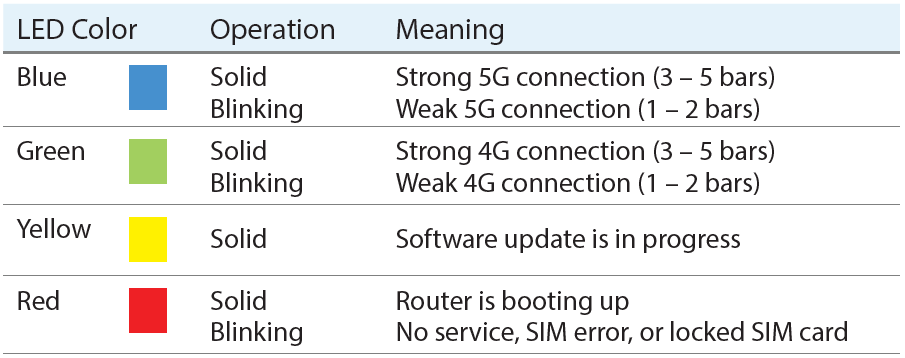
Checking the LED on the device
The LED is located in the SIM compartment and is visible through the protective shield.
Monitoring and managing your FW2000e
You can use multiple options to monitor and manage your 5G Outdoor CPE:
1. Inseego Mobile App - Use the same mobile app you used to install your FW2000e to perform basic device monitoring and management.
2. FW2000e Admin Web UI - Access the Web UI at http://192.168.1.1 for a full set of device management features. The initial sign in password is: “Fast5G! “.
3. Inseego Connect - Go to connect.inseego.com to sign up for a free Inseego Connect account, which provides the fullest experience for monitoring and managing FW2000e devices from anywhere in the world with access to a web browser.