The following Step by step guide will assist in configuring the ALTAI C-series as a WiFi Access Point.
Please Note: No Changes to the configuration will take place until the final step- Save & Apply
Things you will need
- 2 X LAN cable
- Laptop/Desktop PC for configuration
- 240v Mains Power
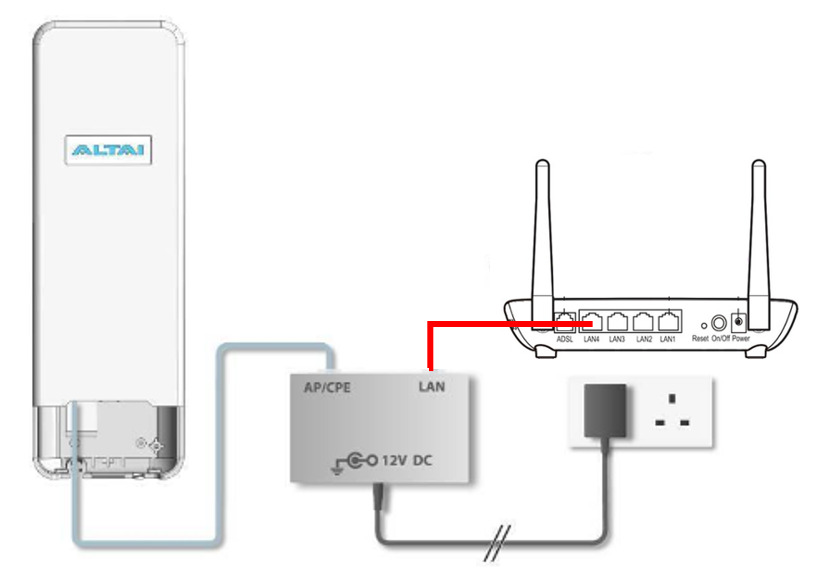
Physical connection diagram
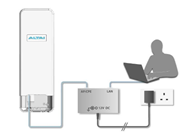
- Connect ALTAI unit and DC injector "POE" port with an Ethernet Cable
- Connect another network cable between DC injector “LAN” port and a
computer Ethernet port. - Connect the AC power adapter to the DC injector and plug it into a power
socket. - Make sure both the Power LED and the Network LED light green
Step-1: Login Procedure
- Ensure your Laptop is in the same Network address space as ALTAI unit. Eg 192.168.1.XXX. Please click "How to change Network/IP address on my PC" if you need step by step instructions.
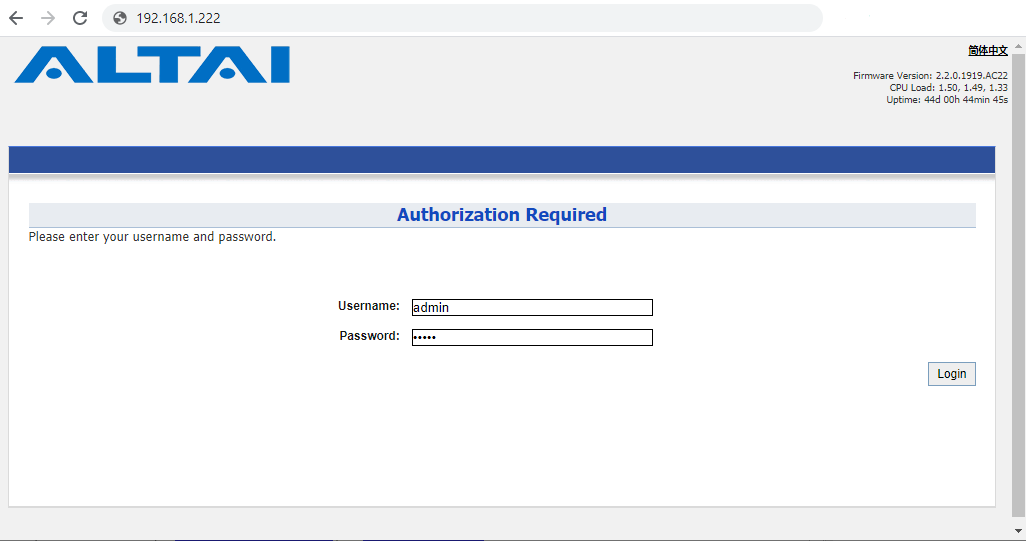
- Open a web browser, type the ALTAI default IP address "192.168.1.222" and hit enter. Please go to "I fogot the ALTAI IP address" to access the unit if default IP is not working.
- The login page will appear. Enter default Username: admin and Password: admin.
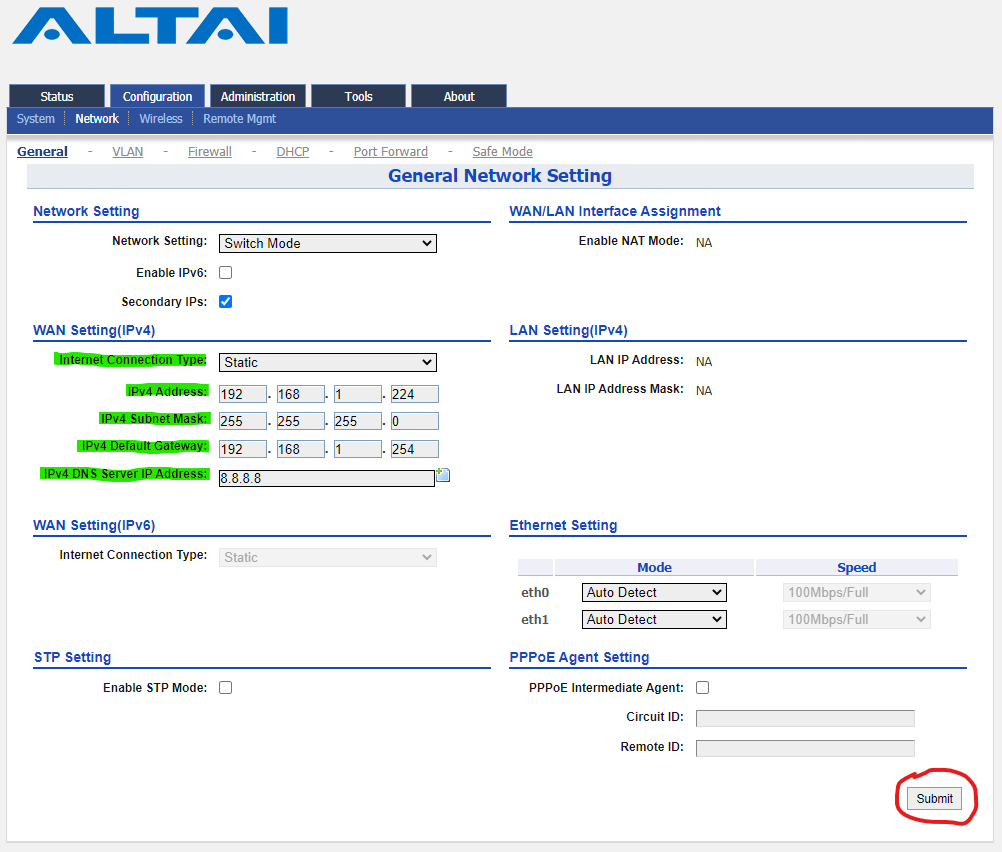
Step-2: Network Configuration
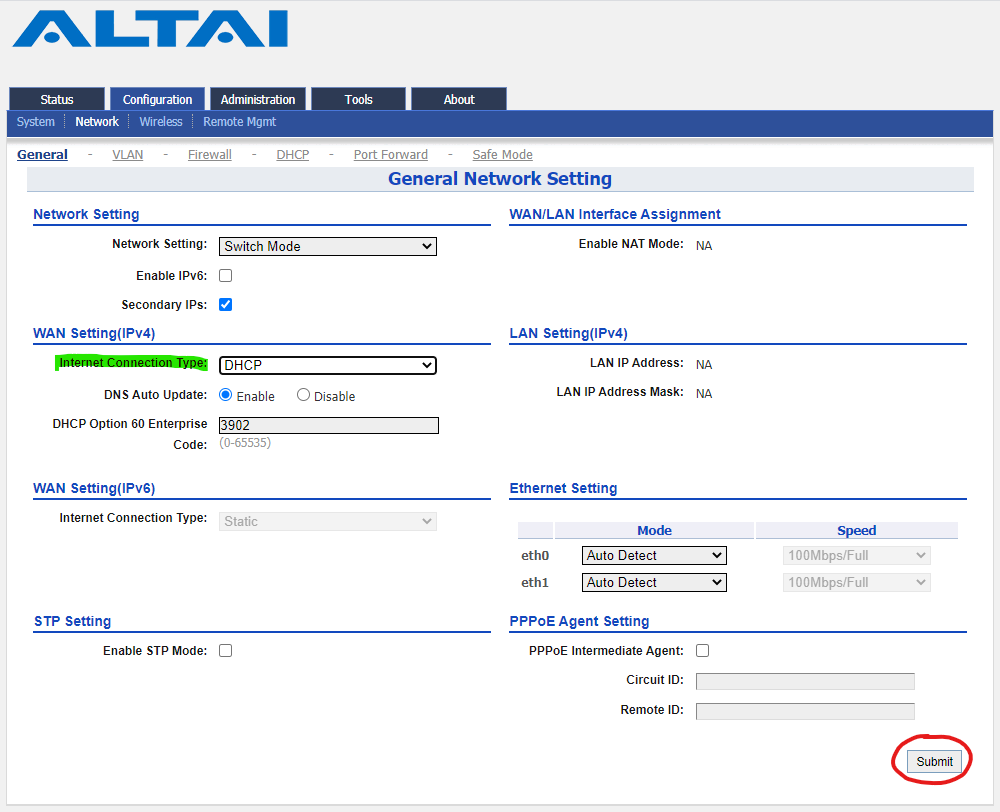
- Go to Configuration-> Network -> General
To configure the ALTAI unit in DHCP mode (ALTAI will obtain IP address automatically from DHCP server)
- Set the "Internet Connection" type to "DHCP"
- Click "Submit" to save the changes.
To configure the ALTAI unit in static IP (Which has to be under the same subnet of the Router/modem)
- Set the "Internet Connection" type to "Static"
- Set desired IP address in "IPv4 Address".
- Set IP address mask in "IPv4 Subnet Mask".
- Set gateway’s IP address in "IPv4 Default Gateway".
- Add DNS server’s IP address mask in DNS Server IP Address.
- Click "Submit" to save the changes.
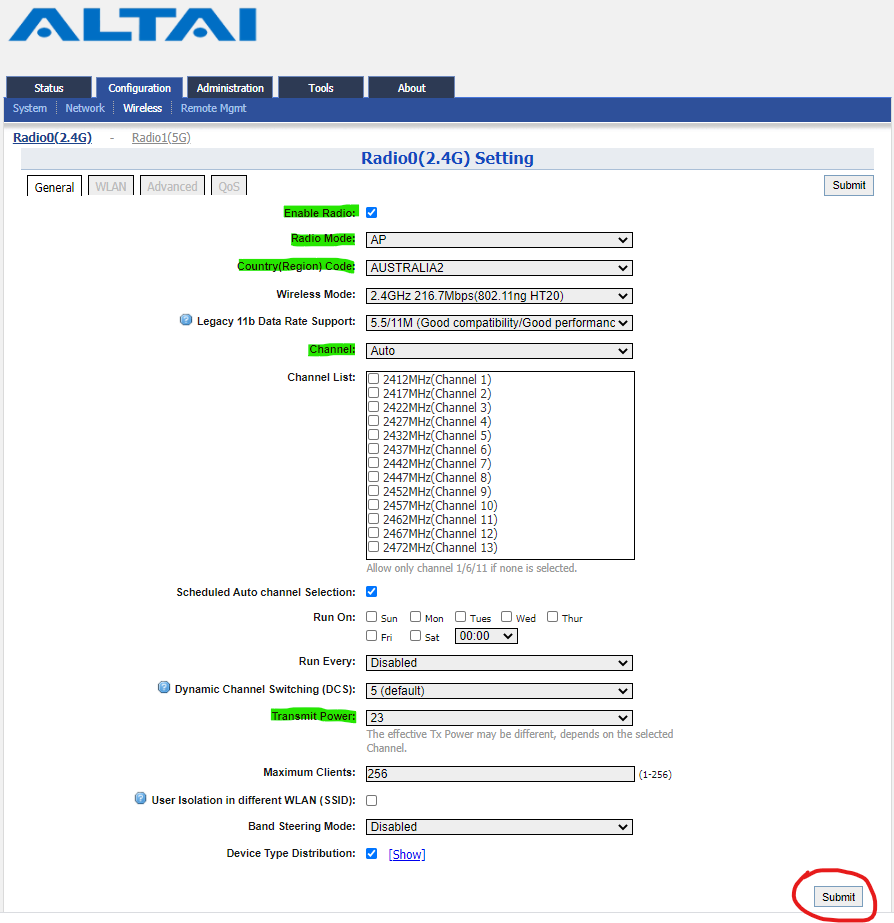
Step-3: Wireless Configuration
- Go to Configuration-> Wireless -> RadioX(XX) -> General
- Tick "Enable Radio"
- Set the "Radio Mode" type to "AP"
- Set the "Country(Region) Code" to "Australia2".
- Set the "Channel" to "Auto".
- Set the "Transmit Power" to maximum or accordingly.
- Click "Submit" to save the changes.
- Go to Configuration-> Wireless -> RadioX(XX) -> WLAN
- Set desired WiFi name to broadcast under "SSID".
- Tick/Untick "Isolation" as per requirement. (If enabled, clients cannot communicate to each other directly in the same WLAN. By default, it is enabled. To use a printer connected via WiFi or google home need to disable Isolation.)
- Select "WPA/WPA2 Personal" to set WiFi password type or select "Open" for no password under "Auth Mode".
- Type in the WiFi password in "PassPhrase".
- Click "Submit" to save the changes.

- Click "Save & Apply" to apply the changes. Wait for the unit to complete the changes.
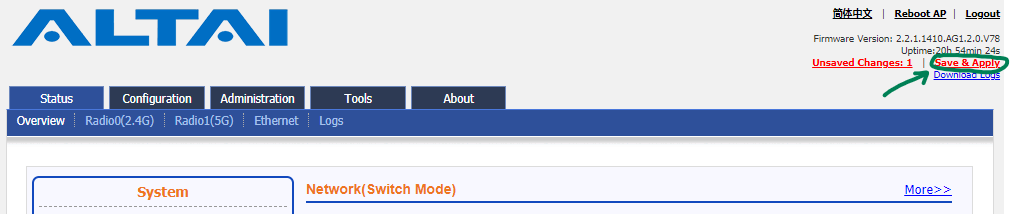
- Now the Access point is ready to connect into your network and test the configuration.